

Every time I logged into BING webmaster tools to check if anyone had clicked on MojaLab, I got an error message telling me that our site was not taking advantage of all the fantastic opportunities offered by IndexNow.
What is IndexNow? It is a protocol introduced by Microsoft that allows search engines (Bing, Yandex, and others) to be notified instantly when a page is created or modified.
From a quick search, it seems that as I write this article (August 2025), IndexNow is still widely used, so it seems worth investing a little time to ensure that every time we publish or edit a page on MojaLAb, IndexNow is automatically used to request indexing by Bing.
I'm not an SEO expert, but as far as I know, Google doesn't offer anything similar for personal websites and blogs. Through Google Search Console, you can request the indexing of specific URLs, and the rest is left to the crawlers.
From a quick search, I understand that many CMSs such as WordPress and others offer fantastic plugins that handle integration with IndexNow, but for what we use (Ghost 5), I haven't found anything ready-made.
It must be said that as soon as the problem arose, I wanted to take the opportunity to continue playing with the Lambda functions and take a small step further by also adding data persistence between calls (which turned out to be essential to avoid bombarding IndexNow with the same URLs).
🚀 Complete Code on GitHub
All Lambda code, build scripts, and detailed documentation are available open-source
View RepositoryA few details about what we'll be using
What is Ghost CMS
Ghost is a modern, open-source content management system designed specifically for blogs and online publications (we are currently (August 2025) using version 5).
Unlike WordPress, Ghost focuses exclusively on writing and publishing content, offering a clean and minimalist interface. It is based on Node.js and uses an advanced Markdown editor that makes writing smooth and fast. Ghost is particularly popular with bloggers, journalists, and creators who want to focus on content without getting lost in complex configurations.
Ghost webhooks: Ghost webhooks are automatic HTTP notifications that are sent when specific events occur on the platform (post publication, updates, member creation, etc.). They allow you to integrate Ghost with external services in real time, automating workflows such as:
-
Automatic email sending when a post is published
-
Synchronization with analytics or CRM systems
-
Slack/Discord notifications for new content
-
Automatic cache or CDN updates
-
Integration with indexing services (as in our case with IndexNow)
-
Automatic content backups
-
Synchronization with newsletter services such as Mailchimp
Webhooks eliminate the need for manual polling or scheduled scripts, making integrations instant and efficient.
What is a Lambda function?
AWS Lambda is Amazon's serverless service that allows you to run code without having to manage servers. Basically, you write a function (in Python, JavaScript, Go, etc.) and AWS takes care of everything else: finding a free server, running the code, automatically scaling if more requests come in, and shutting everything down when it's not needed.
The beauty of it is that you only pay for what you use—literally. If your function runs for 100 milliseconds, you only pay for those 100 milliseconds. If no one calls it for a month, you pay nothing. It's perfect for automation, microservices, and all those things that need to happen "when needed" without having to keep a server running all the time.
In our case with Ghost, Lambda is ideal because:
-
It only wakes up when Ghost sends a webhook
-
It processes the request in a few seconds
-
It goes back to sleep until the next publication
-
It costs practically nothing for a normal blog
It's like having a digital assistant who only works when there's something to do, and you don't have to pay them when they're on a coffee break. (muahahahahaha, what tyrants!)
What is DynamoDB
DynamoDB is Amazon's fully managed NoSQL database—one of those things that "just works" without you having to go crazy with configurations, backups, updates, or other system administrator hassles.
Unlike traditional relational databases (such as MySQL), DynamoDB stores data as key-value pairs, making it extremely fast for simple operations such as "tell me if this URL already exists" or "save this data with an expiration date." It is designed to scale automatically—if your site goes viral tomorrow, DynamoDB will adapt seamlessly (and without you having to do anything).
In our project with Ghost and IndexNow, we will use it as a "short-term memory":
-
We save every URL we process
-
We set an automatic expiration (TTL) of 24 hours
-
Before sending a new URL to IndexNow, we check if we've seen it recently
-
If so, we skip it (because bombarding IndexNow isn't nice)
The cool thing is that after 24 hours, DynamoDB automatically deletes expired records, so you don't have to worry about cleanup or maintenance. It's like having a self-cleaning whiteboard—write down what you need, and when you don't need it anymore, it disappears on its own.
And of course, you only pay for what you use (sounds like the AWS motto at this point).
How it works
The flow is simpler than it might seem:
-
I publish a post on MojaLab (or edit it because I found yet another typo)
-
Ghost sends a webhook to my Lambda with all the details
-
Lambda checks if it has already seen this URL recently (thanks DynamoDB)
-
If it's new, it sends it to IndexNow, which does its job
-
Bing wakes up and says, "Ah, there's something new on MojaLab!"
The "Advanced" Features (because we like to complicate our lives)
Security: Because trust is good, but verification is better
Lambda includes an HMAC signature verification system because, let's face it, leaving a public endpoint that accepts any request is not exactly a great idea:
# Verify that the request really comes from Ghost
signature = hmac.new(
   webhook_secret.encode(),
   body_bytes + timestamp.encode(),
   hashlib.sha256
).hexdigest()
Deduplication: Why IndexNow doesn't need to know 15 times that I corrected a typo
As we mentioned for deduplication, we used DynamoDB. Basically, every URL we process is "remembered" for 24 hours (configurable) to avoid bombarding IndexNow with the same requests.
Is this a bit over-engineering for a personal blog? Absolutely. Did I enjoy doing it? Yes.
Error Handling and Monitoring
-
Detailed logging: all events are tracked in CloudWatch
-
Automatic retries: to handle temporary network errors or rate limiting
-
Debug mode: for troubleshooting signatures and payloads
Technical setup
Prerequisites
-
AWS account with access to Lambda and API Gateway
-
Ghost CMS with administrator privileges
-
FTP/SSH access to your site to publish the IndexNow file
IndexNow Configuration
Generating the IndexNow Key
IndexNow needs to know that we are the owners (or that we have all privileges) of the site for which we are requesting indexing. To do this, it asks us to create a file on our site that is accessible from the Internet.
First, you need to generate a unique key for IndexNow. This can be:
-
An alphanumeric string of at least 8 characters
-
A UUID (recommended)
-
A randomly generated key
Example of a valid key:
a1b2c3d4-e5f6-7890-abcd-ef1234567890
You can also find the instructions here: https://www.bing.com/indexnow/getstarted
Publishing the Verification File
IndexNow requires you to publish a text file in the root of your site to verify ownership:
File name: [your-indexnow-key].txt Content: The same IndexNow key Location: https://tuodominio.tld/\[your-indexnow-key\].txt
Practical example:
-
Chiave: a1b2c3d4-e5f6-7890-abcd-ef1234567890
-
File name: a1b2c3d4-e5f6-7890-abcd-ef1234567890.txt
-
URL finale: https://tuodominio.tld/a1b2c3d4-e5f6-7890-abcd-ef1234567890.txt
-
File content: a1b2c3d4-e5f6-7890-abcd-ef1234567890
How to publish the file:
If you use Ghost(Pro) or managed hosting:
-
Some configurations allow you to add static files
-
Contact support if you do not have direct root access
Via SSH:
This method is ideal if you have command-line access to your server. Replace the placeholders with your actual data.
# 1. Connect to your server via SSH
# Replace "user" and "your_domain_or_ip" with your credentials
ssh user@your_domain_or_ip

# 2. Navigate to your Ghost site's root directory.
# The path might vary, but a common one is /var/www/ghost
# Ask your hosting provider if you're not sure.
cd /var/www/ghost

# 3. Create the verification file with a single command.
# Replace "your-indexnow-key" in both the filename and its content.
echo "your-indexnow-key" > system/files/your-indexnow-key.txt

# 4. (Optional) Verify that the file was created correctly
cat system/files/your-indexnow-key.txt
Via FTP:
If you use a program like FileZilla, Cyberduck, or another FTP client, the process doesn't involve code but rather a series of manual steps.
- Create the file on your computer:
- Open a plain text editor (like Notepad on Windows or TextEdit on Mac).
- Paste your IndexNow key inside. Do not add any extra spaces or new lines.
- Save the file, naming it exactly like your key with a
.txtextension. For example:a1b2c3d4-e5f6-7890-abcd-ef1234567890.txt.
- Connect to your server:
- Open your FTP client and enter your site's host, username, and password to connect.
- Upload the file:
- In the server panel (the one showing the remote files), navigate to your site's root directory.
- Drag and drop the
.txtfile you created from your computer into the server's root directory.
The final goal for both methods is to have the .txt file publicly accessible at the URL https://yourdomain.tld/your-indexnow-key.txt.
Verify IndexNow Configuration
Before proceeding, verify that everything is correct:
# Test file accessibility
curl https://tuodominio.tld/\[your-key\].txt
# It should return exactly your key
Deploying Lambda
Clone the repository:
First, clone the repository:
git clone <https://github.com/doradame/lambda_Ghost_indexNow>
Now enter the folder of the newly cloned repository:
cd lambda_Ghost_indexNow
And proceed to build the .zip file of our lambda function:
# Linux/macOS
./build_deps.sh
# Windows
build_deps.bat
Now that we have our lambda_deplyment.zip, we can access the AWS console and create our function:
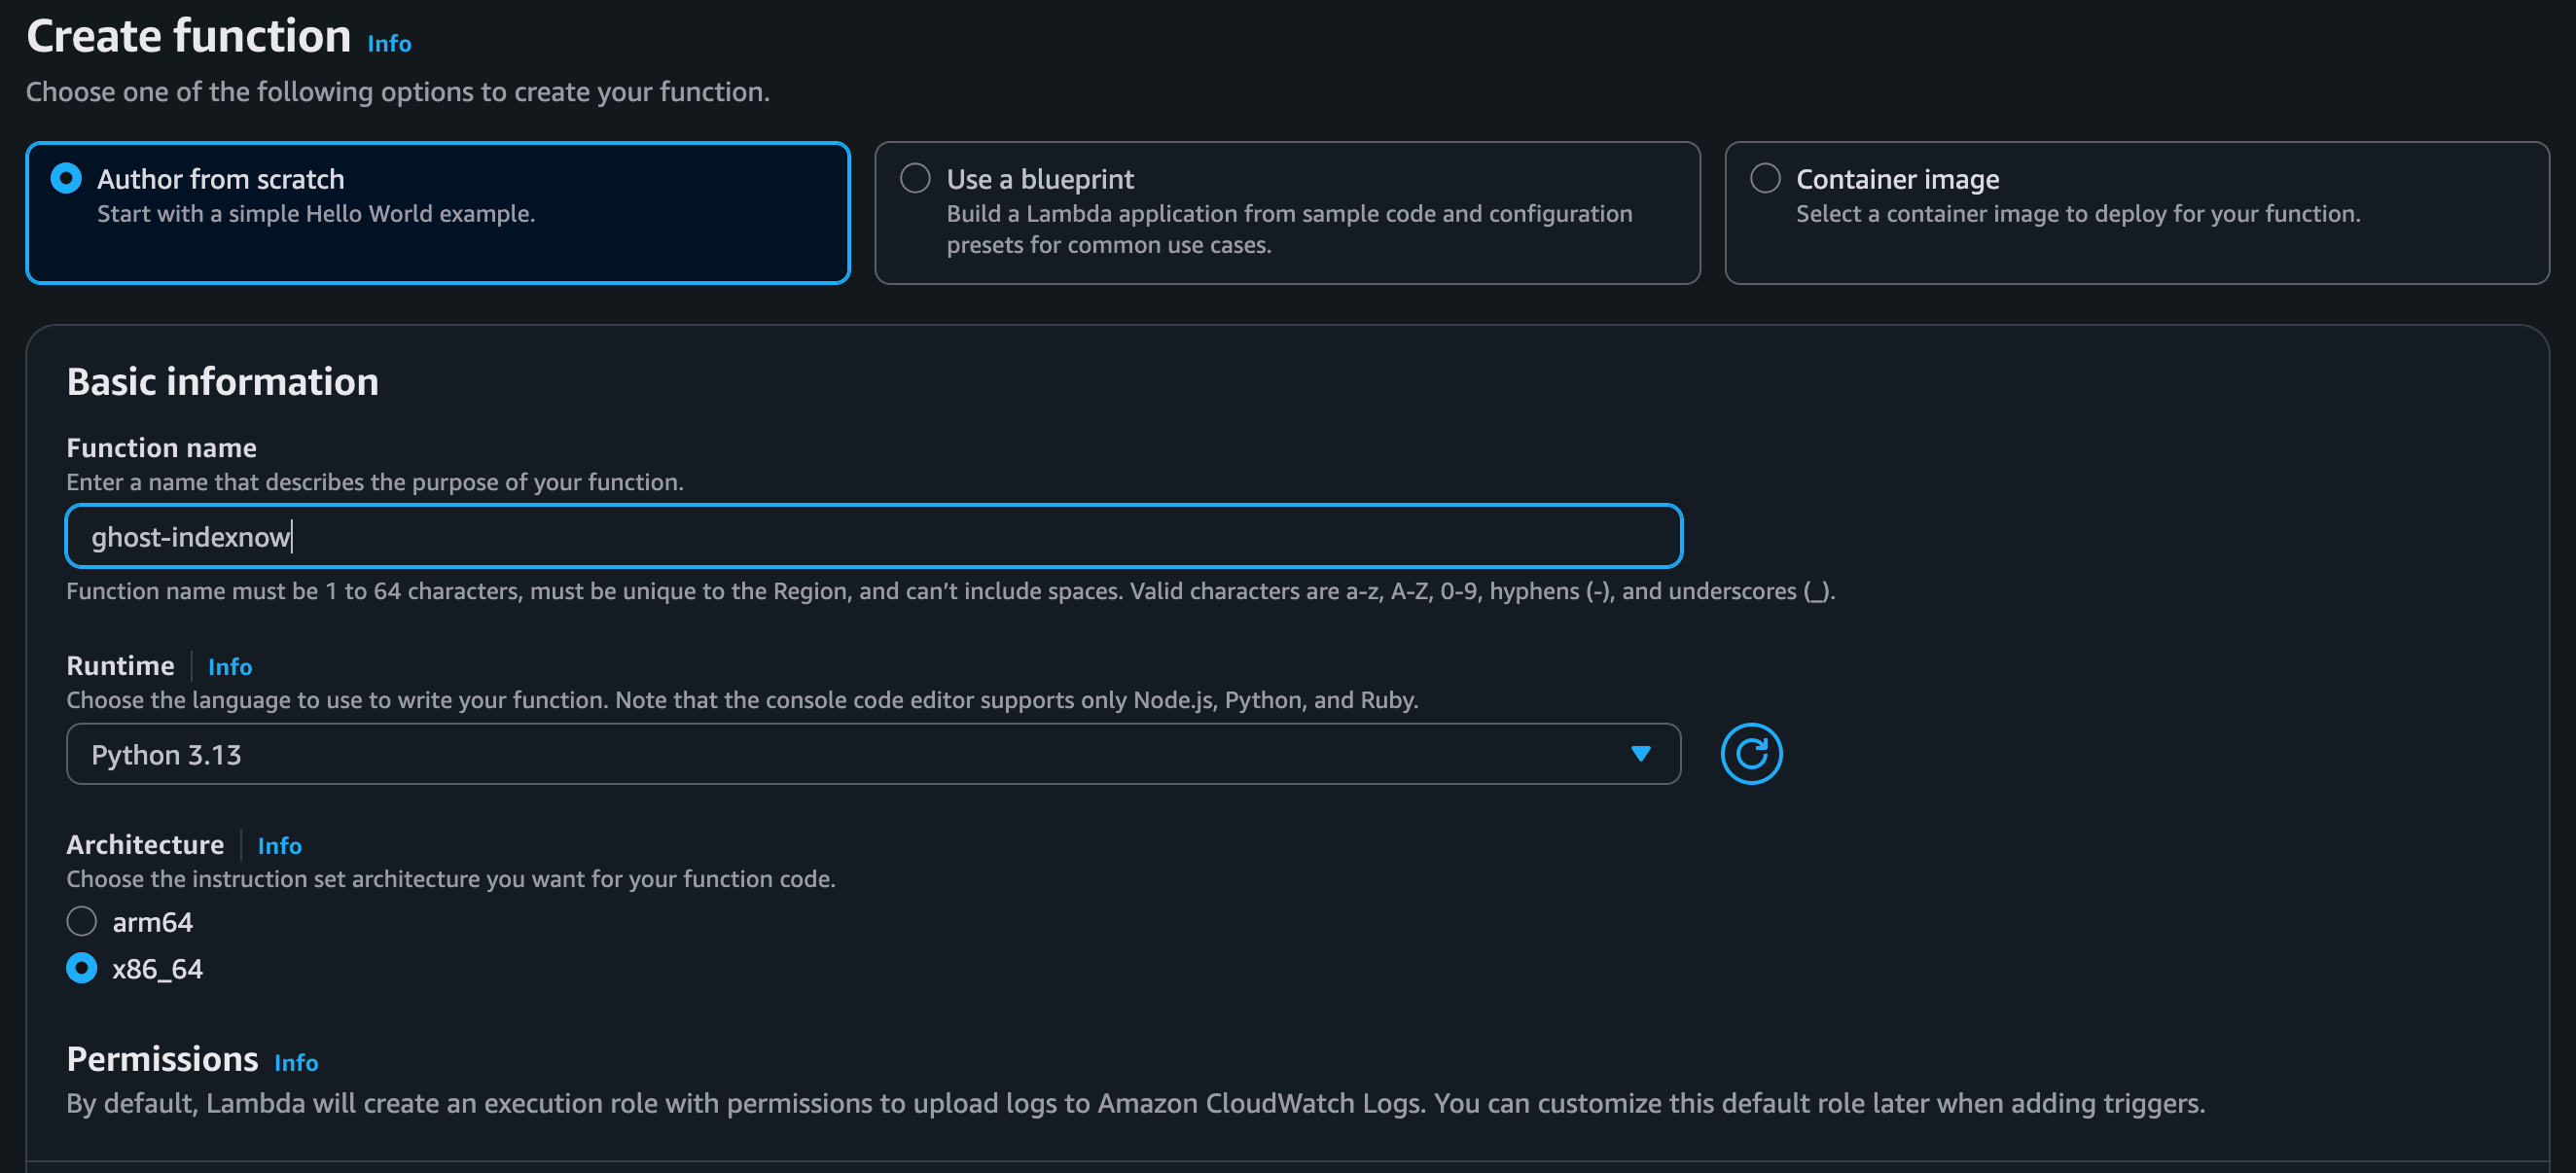
In the newly created function, we upload the ZIP file

Now configure the environment variables in your Lambda using the necessary values:
INDEXNOW_KEY=a1b2c3d4-e5f6-7890-abcd-ef1234567890
PUBLIC_SITE_URL=https://tuodominio.tld
GHOST_WEBHOOK_SECRET=my-super-secret-webhook-key-12345678
Please note: We will obtain the Ghost Webhook secret word when we perform the final configuration. We do not have it at this time, but that is fine.
Explanation of variables:
-
INDEXNOW_KEY: The key you generated and published
-
INDEXNOW_KEY_LOCATION: Full URL of the .txt file on your site
-
PUBLIC_SITE_URL: Base URL of your site
-
GHOST_WEBHOOK_SECRET: The secret configured in Ghost webhooks
-
DDB_TABLE_NAME=your-dynamo-db-table-name
The last is an advanced options for deduplication (You will also need to configure DynamoDB if you want to use this feature, but it's extremely simple, as we'll see shortly):
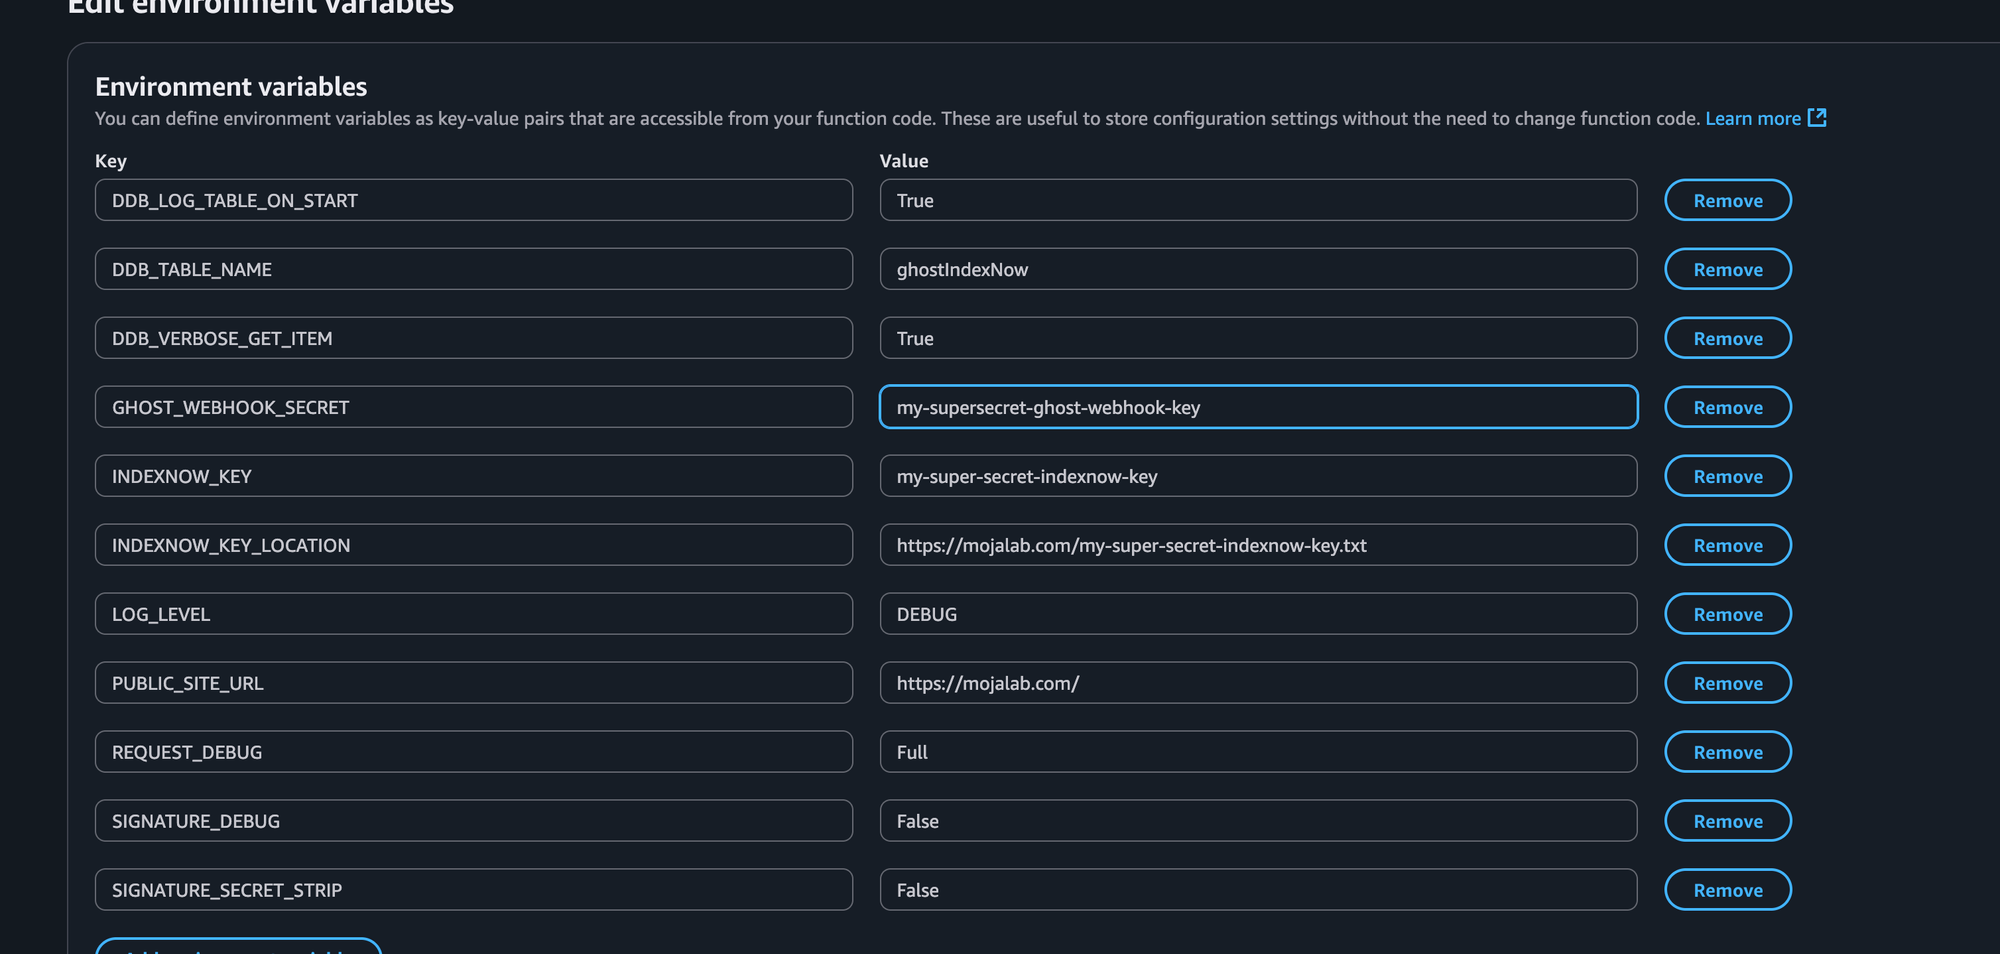
In the README.md file in the GitHub repository, there are also additional explanations about the environment variables.
Now that we have our Lambda code and the environment variables correctly configured, we need to make everything callable from Ghost. To do this, we will configure a trigger:
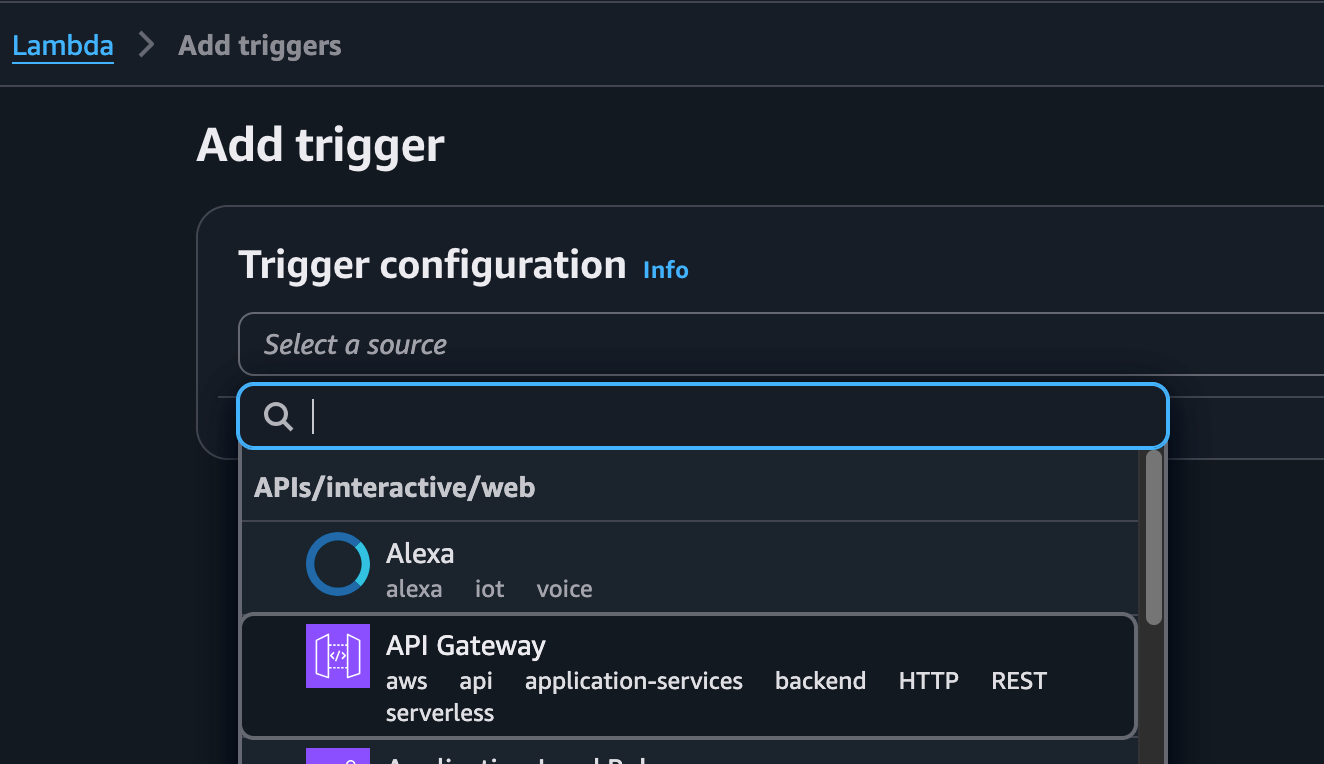
Select API Gateway and configure as follows:
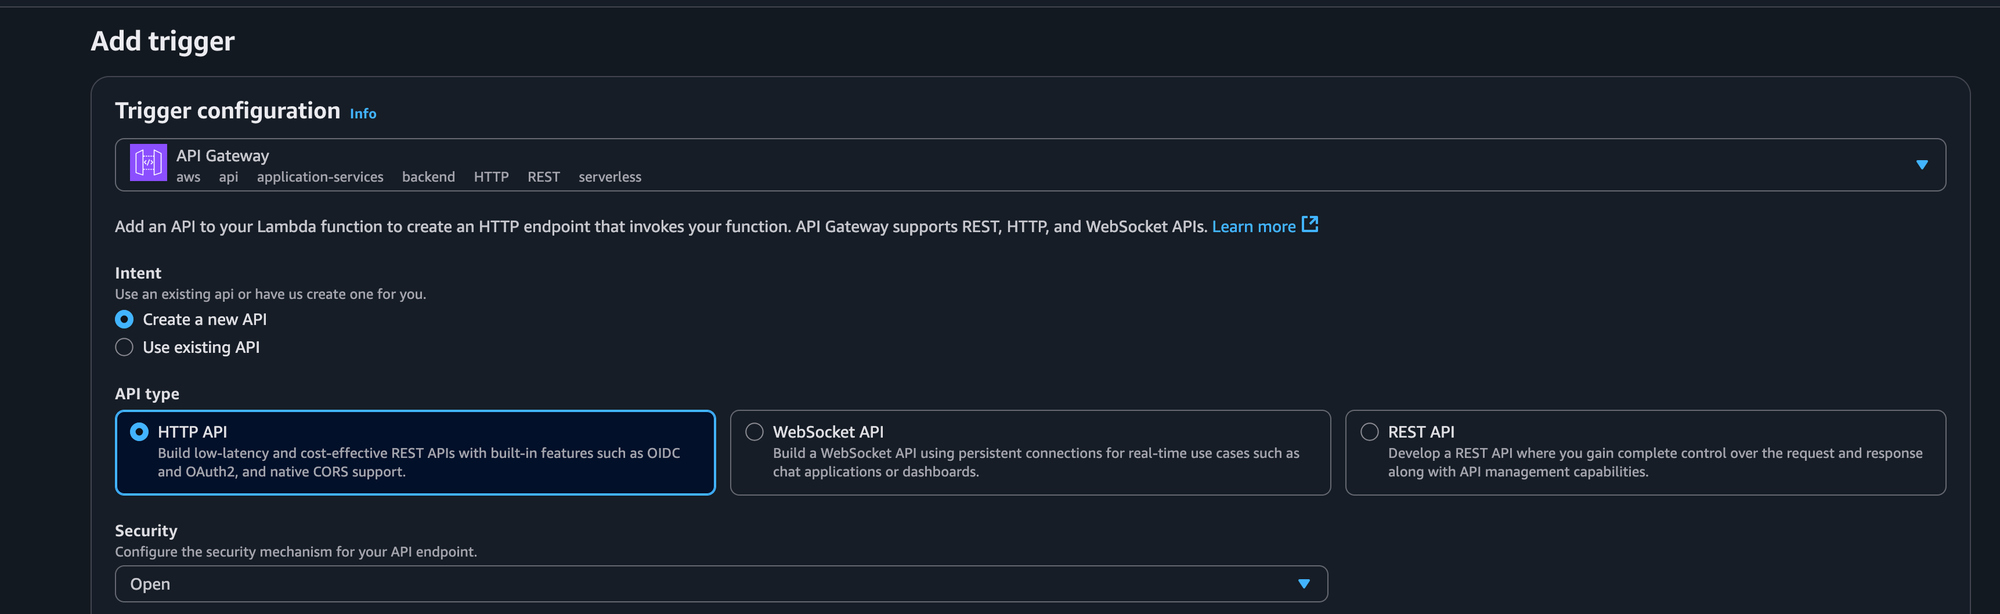
We can leave "Security" set to "Open" because Ghost will sign calls with a shared secret word. This will prevent a third party from sending calls pretending to be our CMS (in any case, I don't see why they would, but this is a wrong way of thinking, so security first!).
When we are done, click ADD and make a note of the name of our endpoint, as we will use it to configure the integration on Ghost.
DynamoDB configuration
This step is necessary to configure DynamoDB and allow Lambda to use it. Even if you have never done this before, don't be alarmed. At our level, it is extremely simple and allows us to connect to this service, which can become yet another tool in our toolbox. Let's get started.
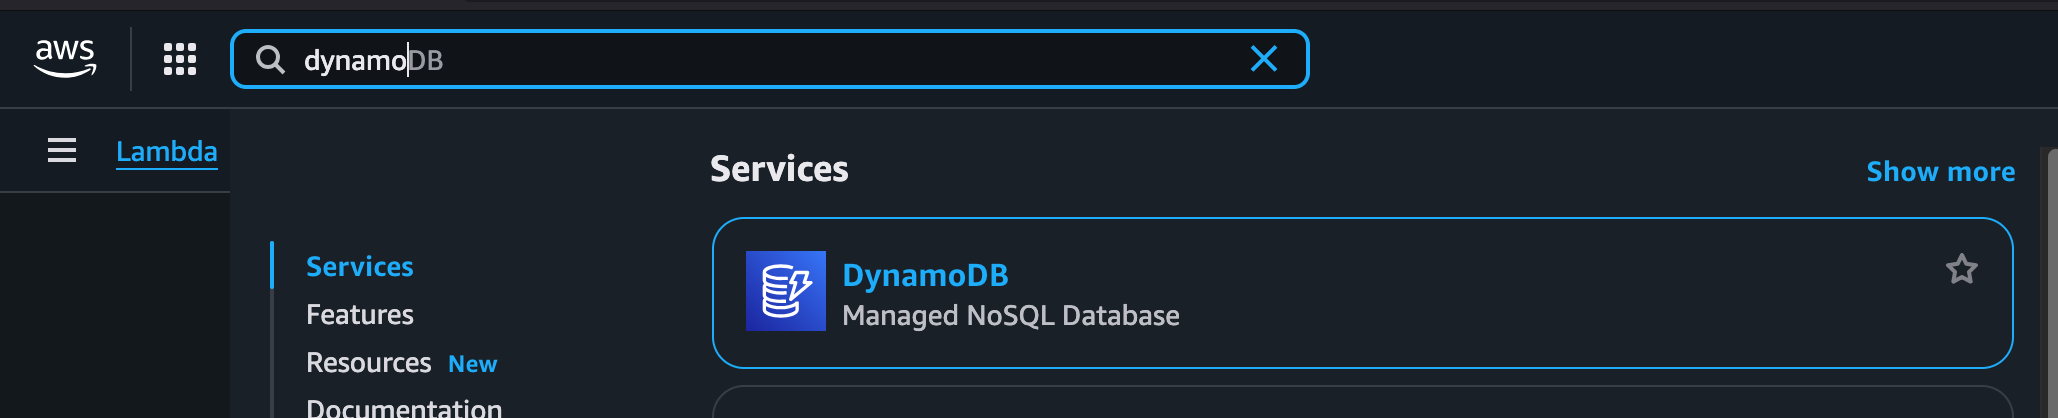
In the AWS console, search for DynamoDB and click on the result found:
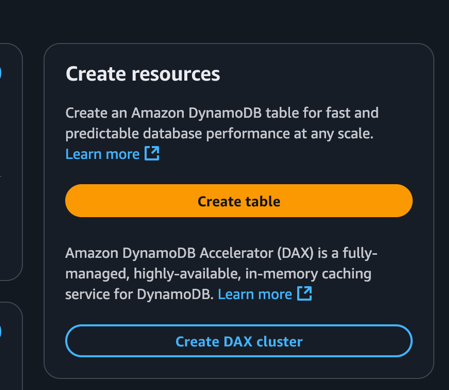
Select Create Table:
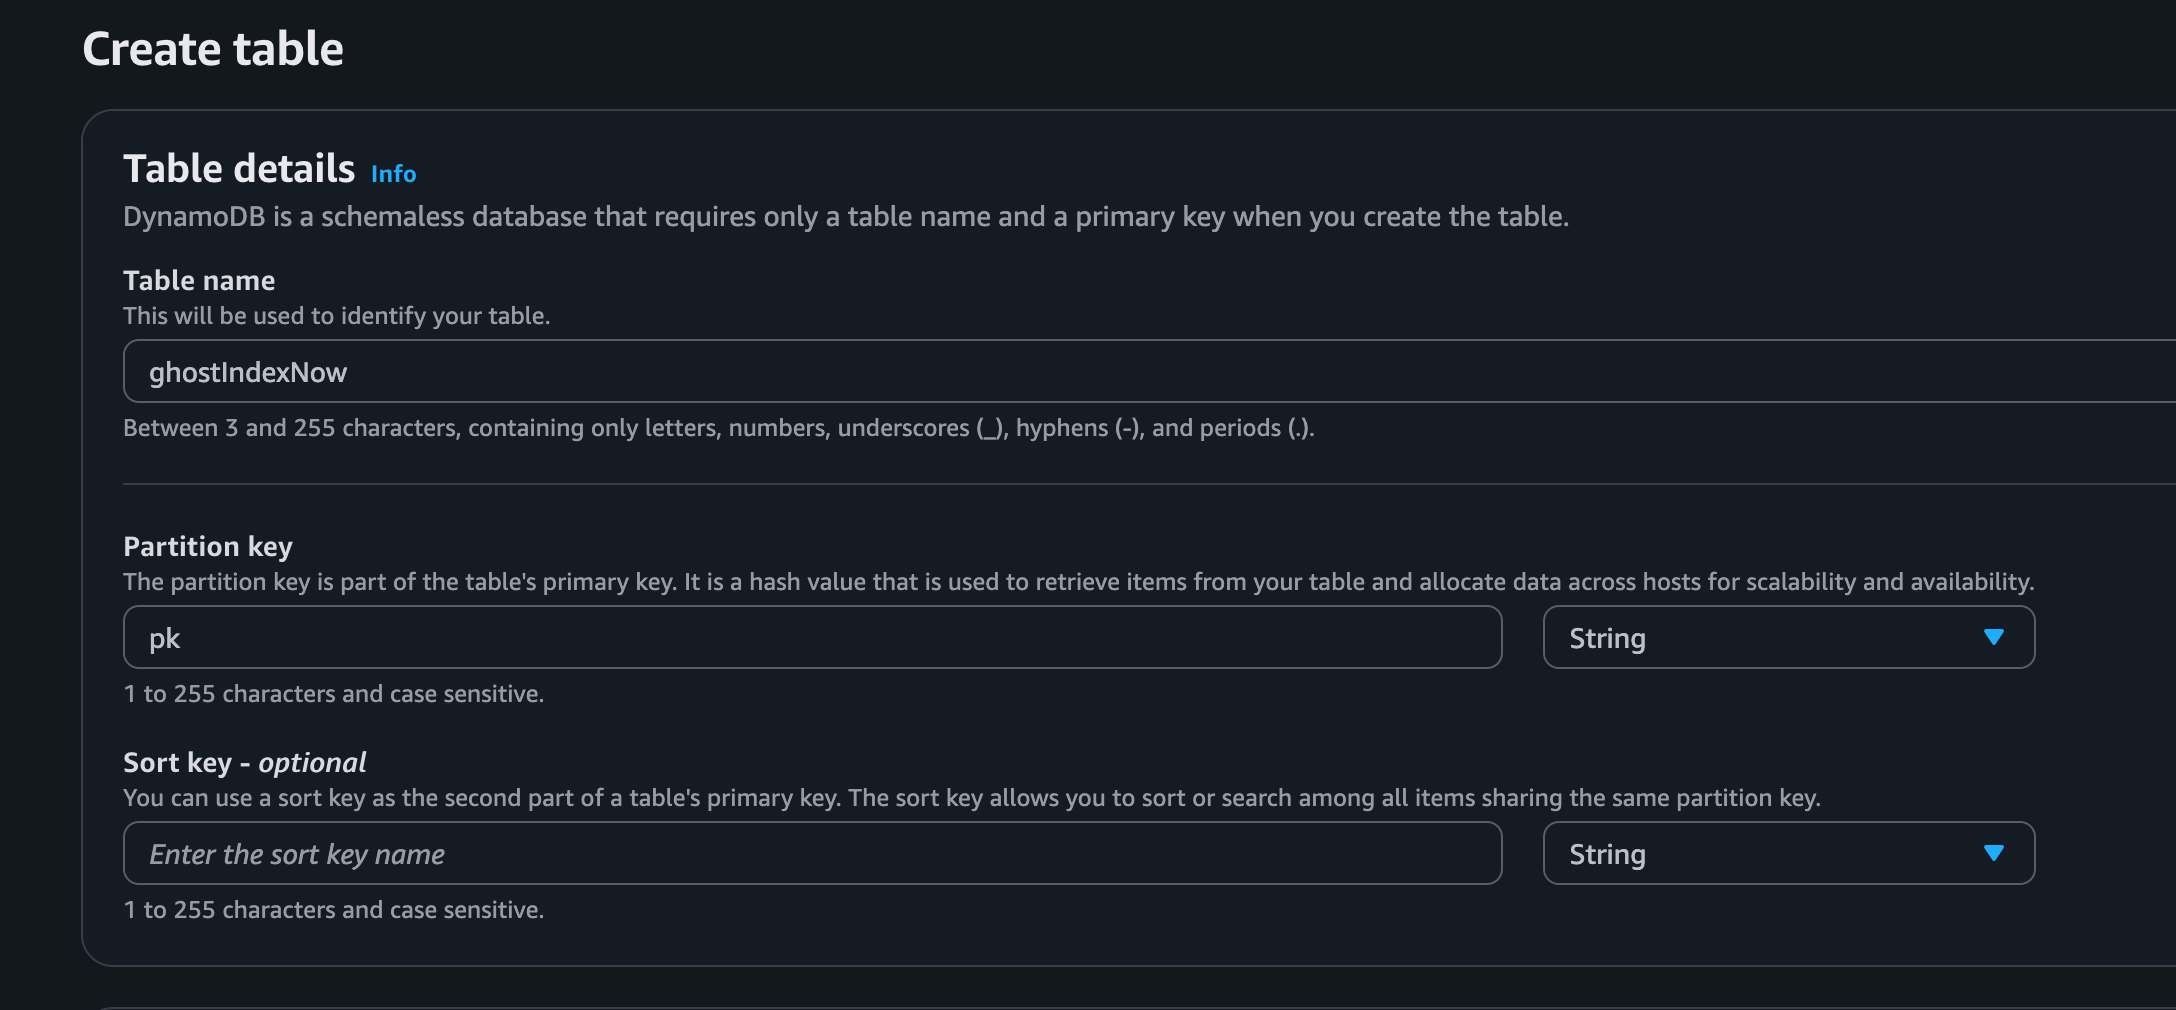
Choose the name of the table and the name of the primary key (pk), which will be of type String:
Enter the newly created table by clicking on its name:

At this point, we want to enable TTL. To do this, after entering the table, select Enable TTL
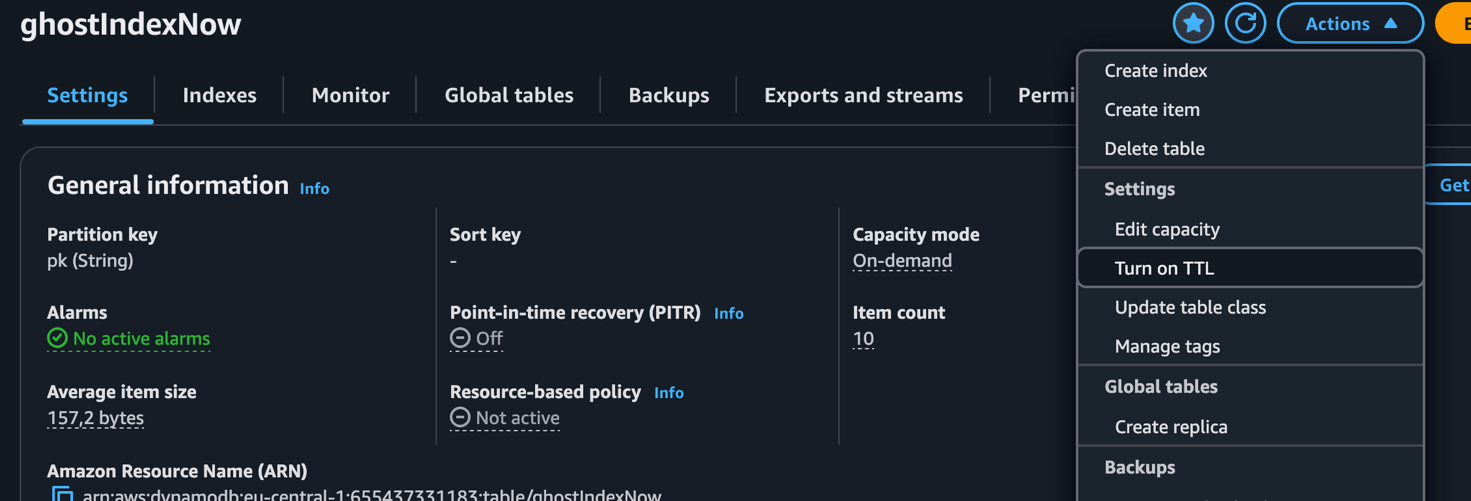
In the screen that opens, we just need to specify the name of the parameter in which our lambda saves the timestamp at which the record will be deletable: expiresAt
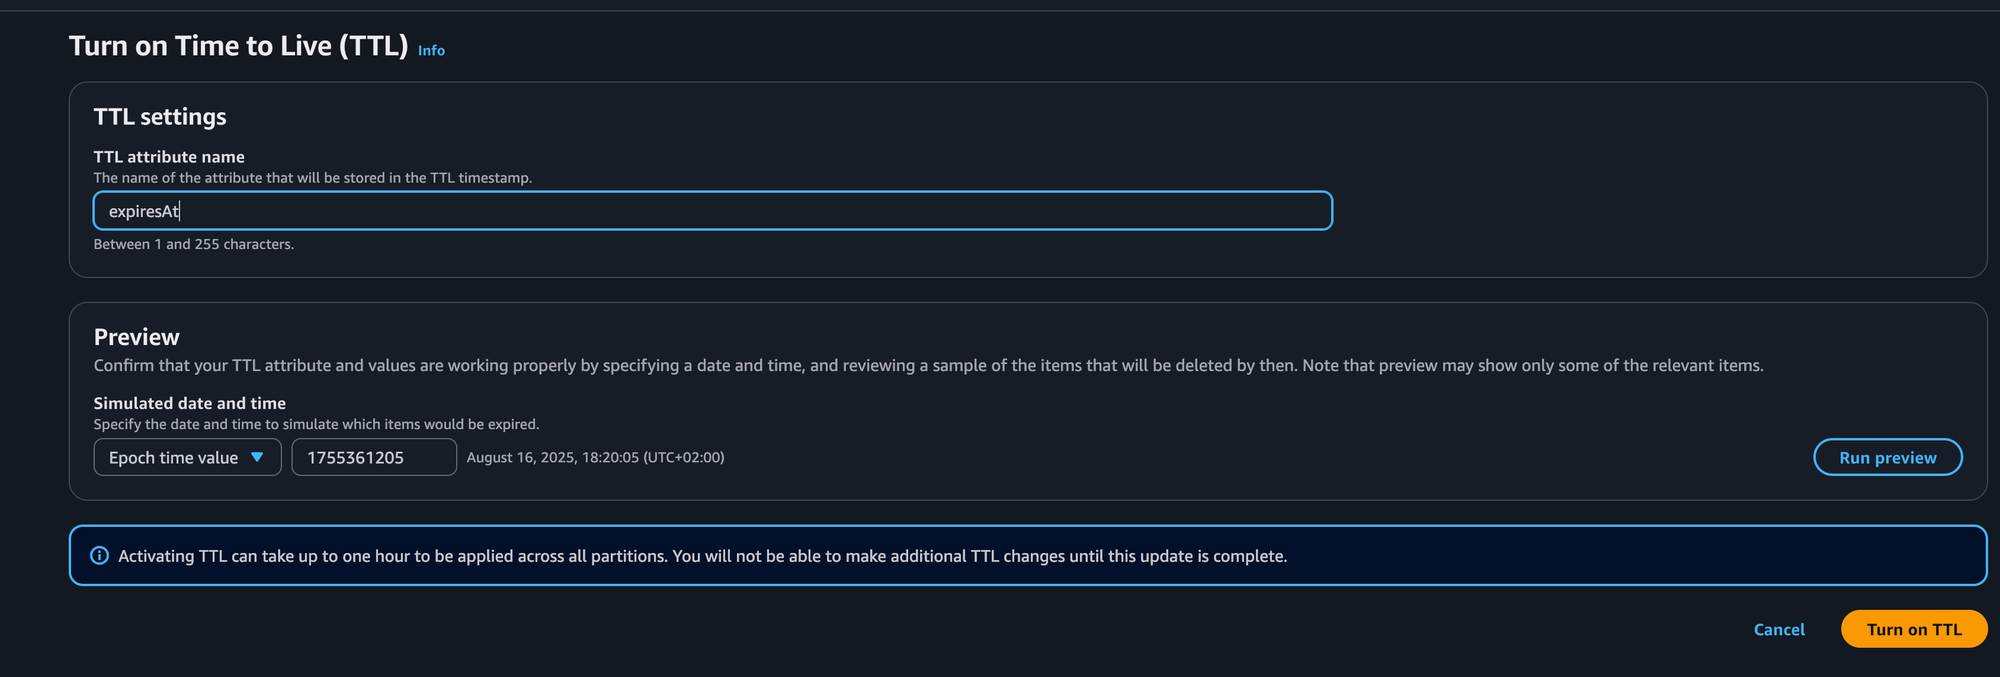
Easy configuration of DynamoDB complete.
Now we need to go back to the lambda for a moment to give it permission to use our newly created table. To do this, we need to remember the name of the table (in my case ghostIndexNow) and the region in which we created it (in my case eu-central-1)
The permissions we will give are:
-
PutItem
-
GetItem
-
DescribeTable
To do this, let's go back to our Lambda function, select Permission in the configuration, and then click on the name of the ExecutionRole.
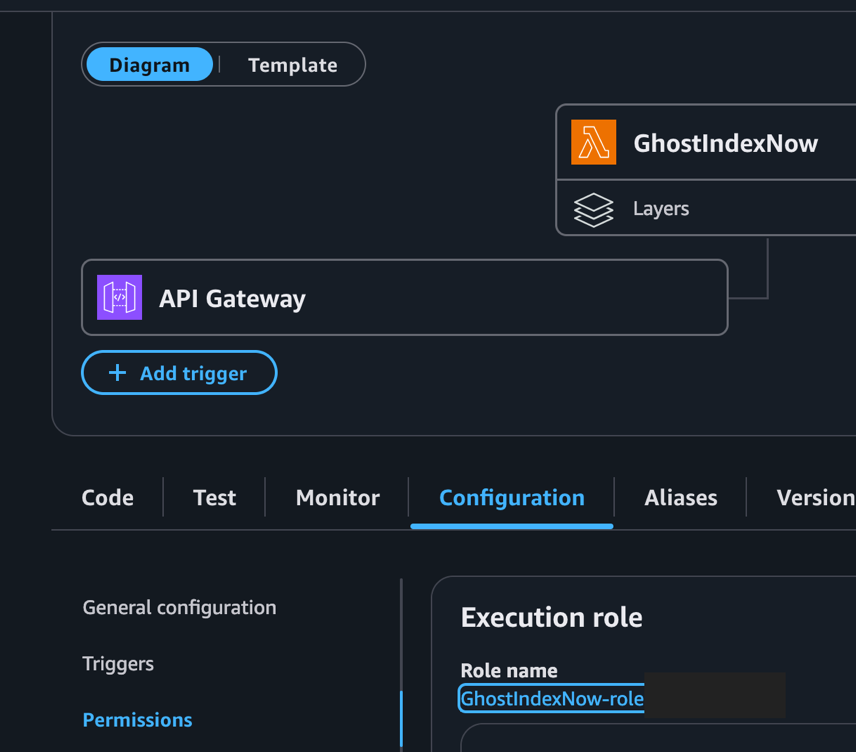
In the permission Policy, click on "Add Permission."

And then "Inline Policy."
Here we will be asked which service we want to give permissions to. Select DynamoDb and then, in "Actions allowed," select the three we mentioned earlier (PutItem, GetItem, and DescribeTabl):
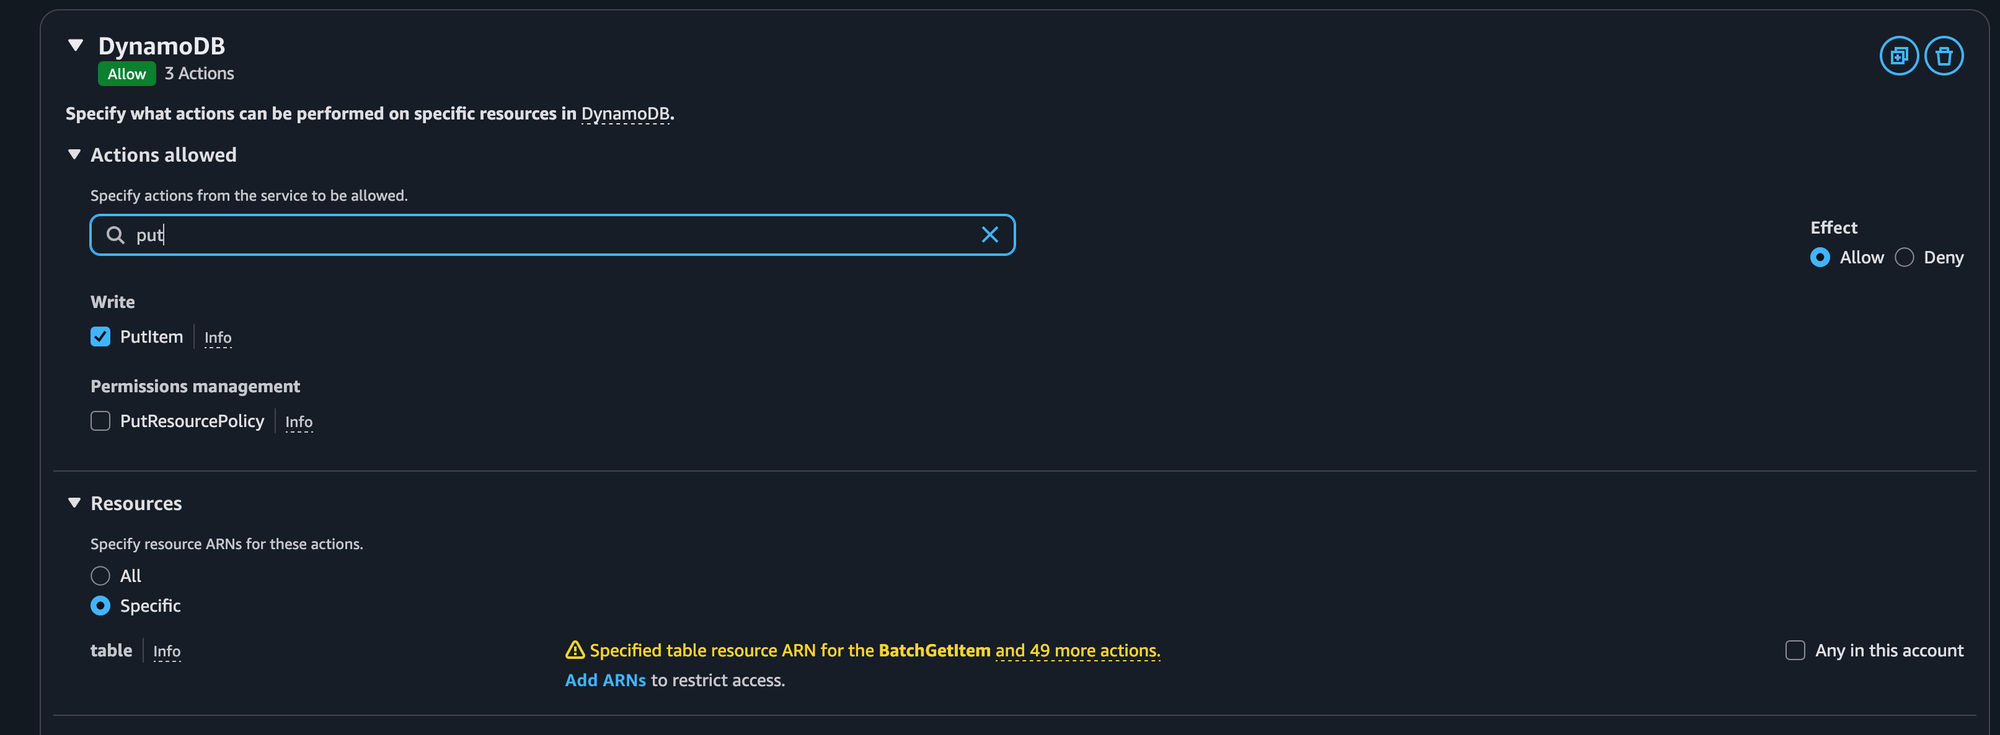
At this point, to further restrict access to our table only, click on "Add ARNs" and fill in as follows:
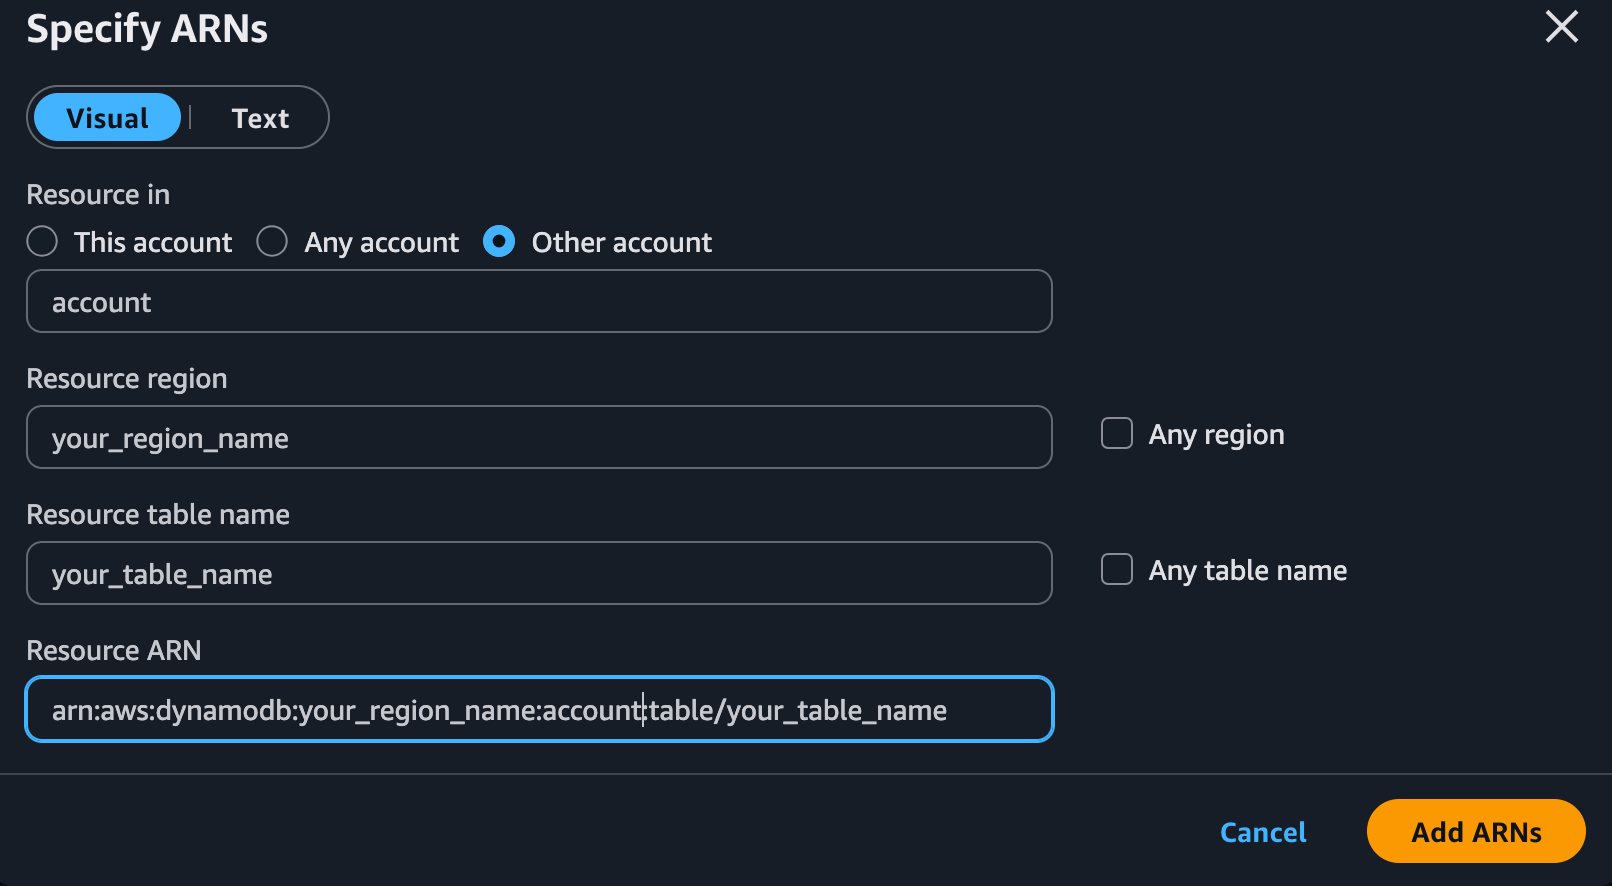
Obviously, you will need to use "This Account" and fill in the region where you created the table on Dynamo and the correct name of the table. Once everything is done, click on Add ARNs and you are done.
Ghost Integration Configuration
Now that we have:
-
The IndexNow key configured and accessible on our site
-
The Lambda function created, configured, and authorized to use DynamoDB
-
The DynamoDB table ready with items inside that will self-delete upon expiration
We are ready for the last step: creating the automation on Ghost to call our Lambda whenever necessary.
Step 1: Accessing Integrations
-
Access the Ghost Admin panel
-
Go to Settings
-
Select Integrations
-
Click on "+ " Click on "Add custom integration"
Step 2: Basic Configuration
-
Integration name: "IndexNow Auto-Indexing" (or a name of your choice)
-
Description: "Automatic URL submission to IndexNow on post publish/update"
-
Click Create
2. Webhook Configuration
After creating the integration, you will see a screen with options for webhooks.
Here we see the webhook only for publishing a post, but you also need to create ones for editing (both Posts and Pages).
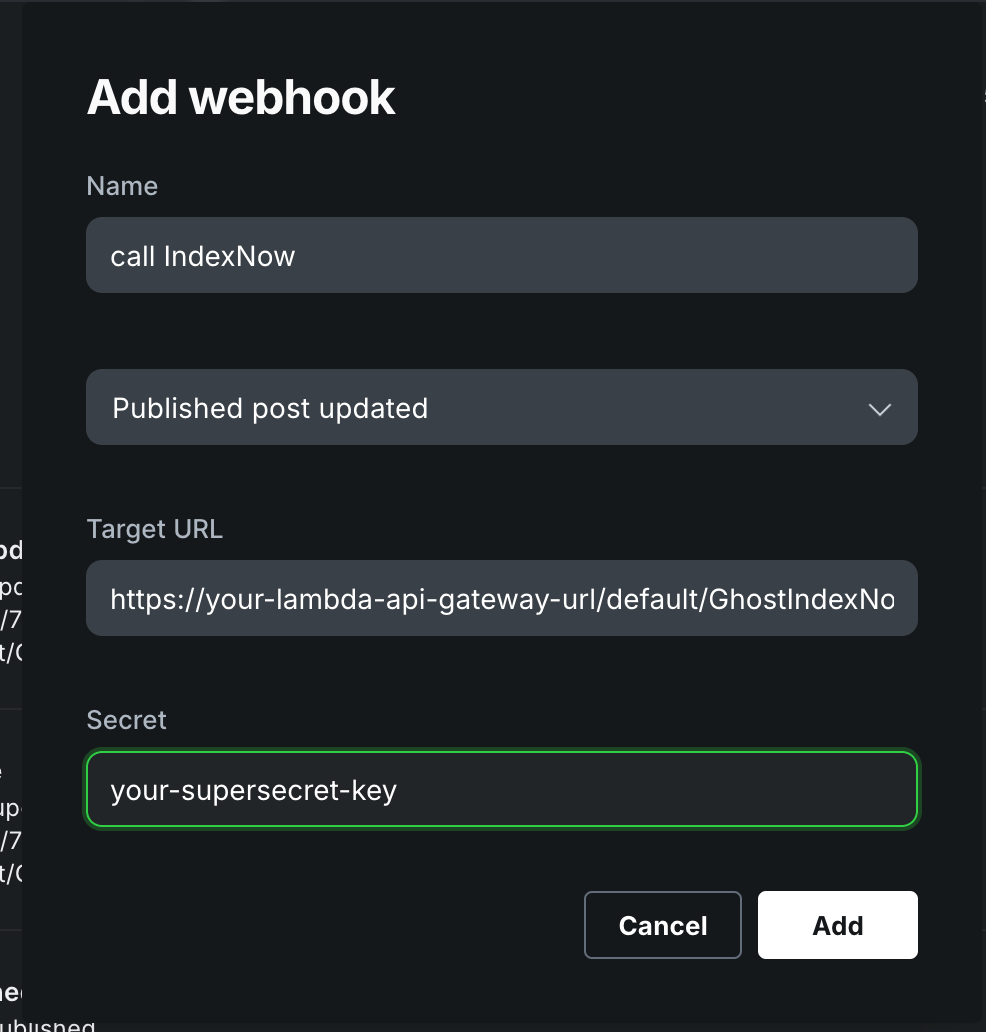
Webhook for Post Publication:
-
In the Webhooks section, click Add webhook
-
Name: "Post Published - IndexNow"
-
Event: Select Post published
-
Target URL: https://[your-api-gateway-url]/[stage]
-
Secret: Generate a secure string (at least 32 characters)
- Esempio: my-super-secret-webhook-key-12345678
-
Click Create
Warning: return to the lambda configuration to enter the chosen secret in the environment variables
Let's test everything
Lambda test:
-
Create or edit a post in Ghost
-
Check the CloudWatch logs to verify that Lambda receives the call
-
Check that the URL is extracted correctly
-
Verify that it is sent to IndexNow (status 200)
Common debugging:
If webhooks are not working:
-
Verify that the API Gateway URL is correct and public
-
Check that Lambda has permission to be invoked by API Gateway
-
Ensure that API Gateway is configured for proxy integration
If the signature fails:
-
Set SIGNATURE_DEBUG=true temporarily
-
Verify that the secret is identical in Ghost and Lambda
-
Try SIGNATURE_SECRET_STRIP=true for whitespace issues
If IndexNow rejects requests:
-
Verify that the .txt file is publicly accessible
-
Check that the key in the file matches the one in the request
-
Make sure the site URL is correct
Conclusions
I've been using this integration for a few days and I'd say it works. If it doesn't, let me know on GitHub. If you need help setting everything up, let us know and we'll try to help you as much as we can.
Sure, we could have just used a third-party service or waited for someone to make a plugin for Ghost (which may already exist). But where would be the fun in that?
The code is completely open-source on GitHub with full documentation (which I wrote mainly for my future self who will forget how it all works). If you feel like getting your hands dirty or have any questions, feel free to open an issue on the repository.
And if you implement the solution for your blog, let me know how it goes!
Disclaimer: At MojaLab, we aim to provide accurate and useful content, but hey, we’re human (well, mostly)! If you spot an error, have questions, or think something could be improved, feel free to reach out—we’d love to hear from you. Use the tutorials and tips here with care, and always test in a safe environment. Happy learning!!!
No AI was mistreated in the making of this tutorial—every LLM was used with the respect it deserves.
Built with ❤️ by the MojaLab team.